Forms and questionnaires
To create a form:
- Click “Create content” in the top-right corner of the screen (or “My Sections”)
- Click “Webform” or “Create Webform”
- Give your form a title and (optionally) a body
- (optional) Define a parent for the Webform by clicking on the “Menu settings” dropdown
- Click “Save”
Webform fields
Now that you have your form, you can add fields to it; these are called “Components”.
Date
For entering calendar dates. Comes with a handy date picker.
Like a text field, but with email address validation (i.e. will throw an error if the input is not along the lines of “username@domain.tld”)
Fieldset
Fieldsets can be used to group elements together. They can also be collapsed to save space on the page.
To add a field to a fieldset, drag it to the lower-right of the fieldset item in the form editor.
File
Allows the user to upload a file. Filetype and size can be restricted; for example, you could only allow users to upload JPEG images smaller than 1mb.
Grid
Gives a series of radio buttons on the X axis and questions on the Y axis. Useful for questionnaires where the same set of answers is used on a series of questions- for example, rating a number of things from 1 to 5.
Hidden
Hidden elements store data, but they are not displayed to the user. Useful for more technical things; for example, you could use token values to store the user’s username and IP address.
Markup
Allows you to enter BBCode or plain HTML (for example, if you wanted to add a few paragraphs of text, or an image, in the middle of your form).
Page break
Used to split a form across multiple pages.
Select options
Can be either a dropdown or series of checkboxes, depending on whether the “multiple” option is ticked (to allow users to select multiple items)
Textarea
A multi-line textbox.
Textfield
A single-line textbox.
Time
Time of day. Can use either the 12-hour (AM/PM) or 24-hour format.
Email responses
Webforms can be set up to send automated emails upon form submission. For example, one could:
- Email the user to confirm that their form has been submitted
- Email the webmaster with the contents of the form submission
If an email field has been specified in the form, the contents of this field can be used as a recipient address.
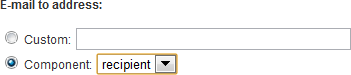
Since users already have email addresses specified in their accounts, you can use this as the recipient address by populating a hidden field with it:
![]()
When creating this field, enter this in the default value box:
Submission

Under the "Webform" tab and the "Form settings" sub-tab, several settings can be changed:
- Message to be displayed upon submission
- Redirection destination
- Submission limit (number of times that the form can be submitted by a single user)
- Form status (form can be "closed" to prevent further submissions)
- Submission access (limit submission to certain types of user)
- Available as block (allows the form to be placed in the sidebar of other pages)
- Allow users to save a draught (partially-completed forms will be stored so that users can come back and finish them later)
- Submit button text
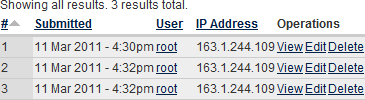
Viewing responses
Form responses can be viewed and downloaded.

Categories: Web