Adding Printers in macOS
Note: Printing is NOT accessible via the eduroam wireless network. To print from a wireless device you will need to connect to Physics_S
To add a set of printers to your Mac, open self-service and click on the printers tab:
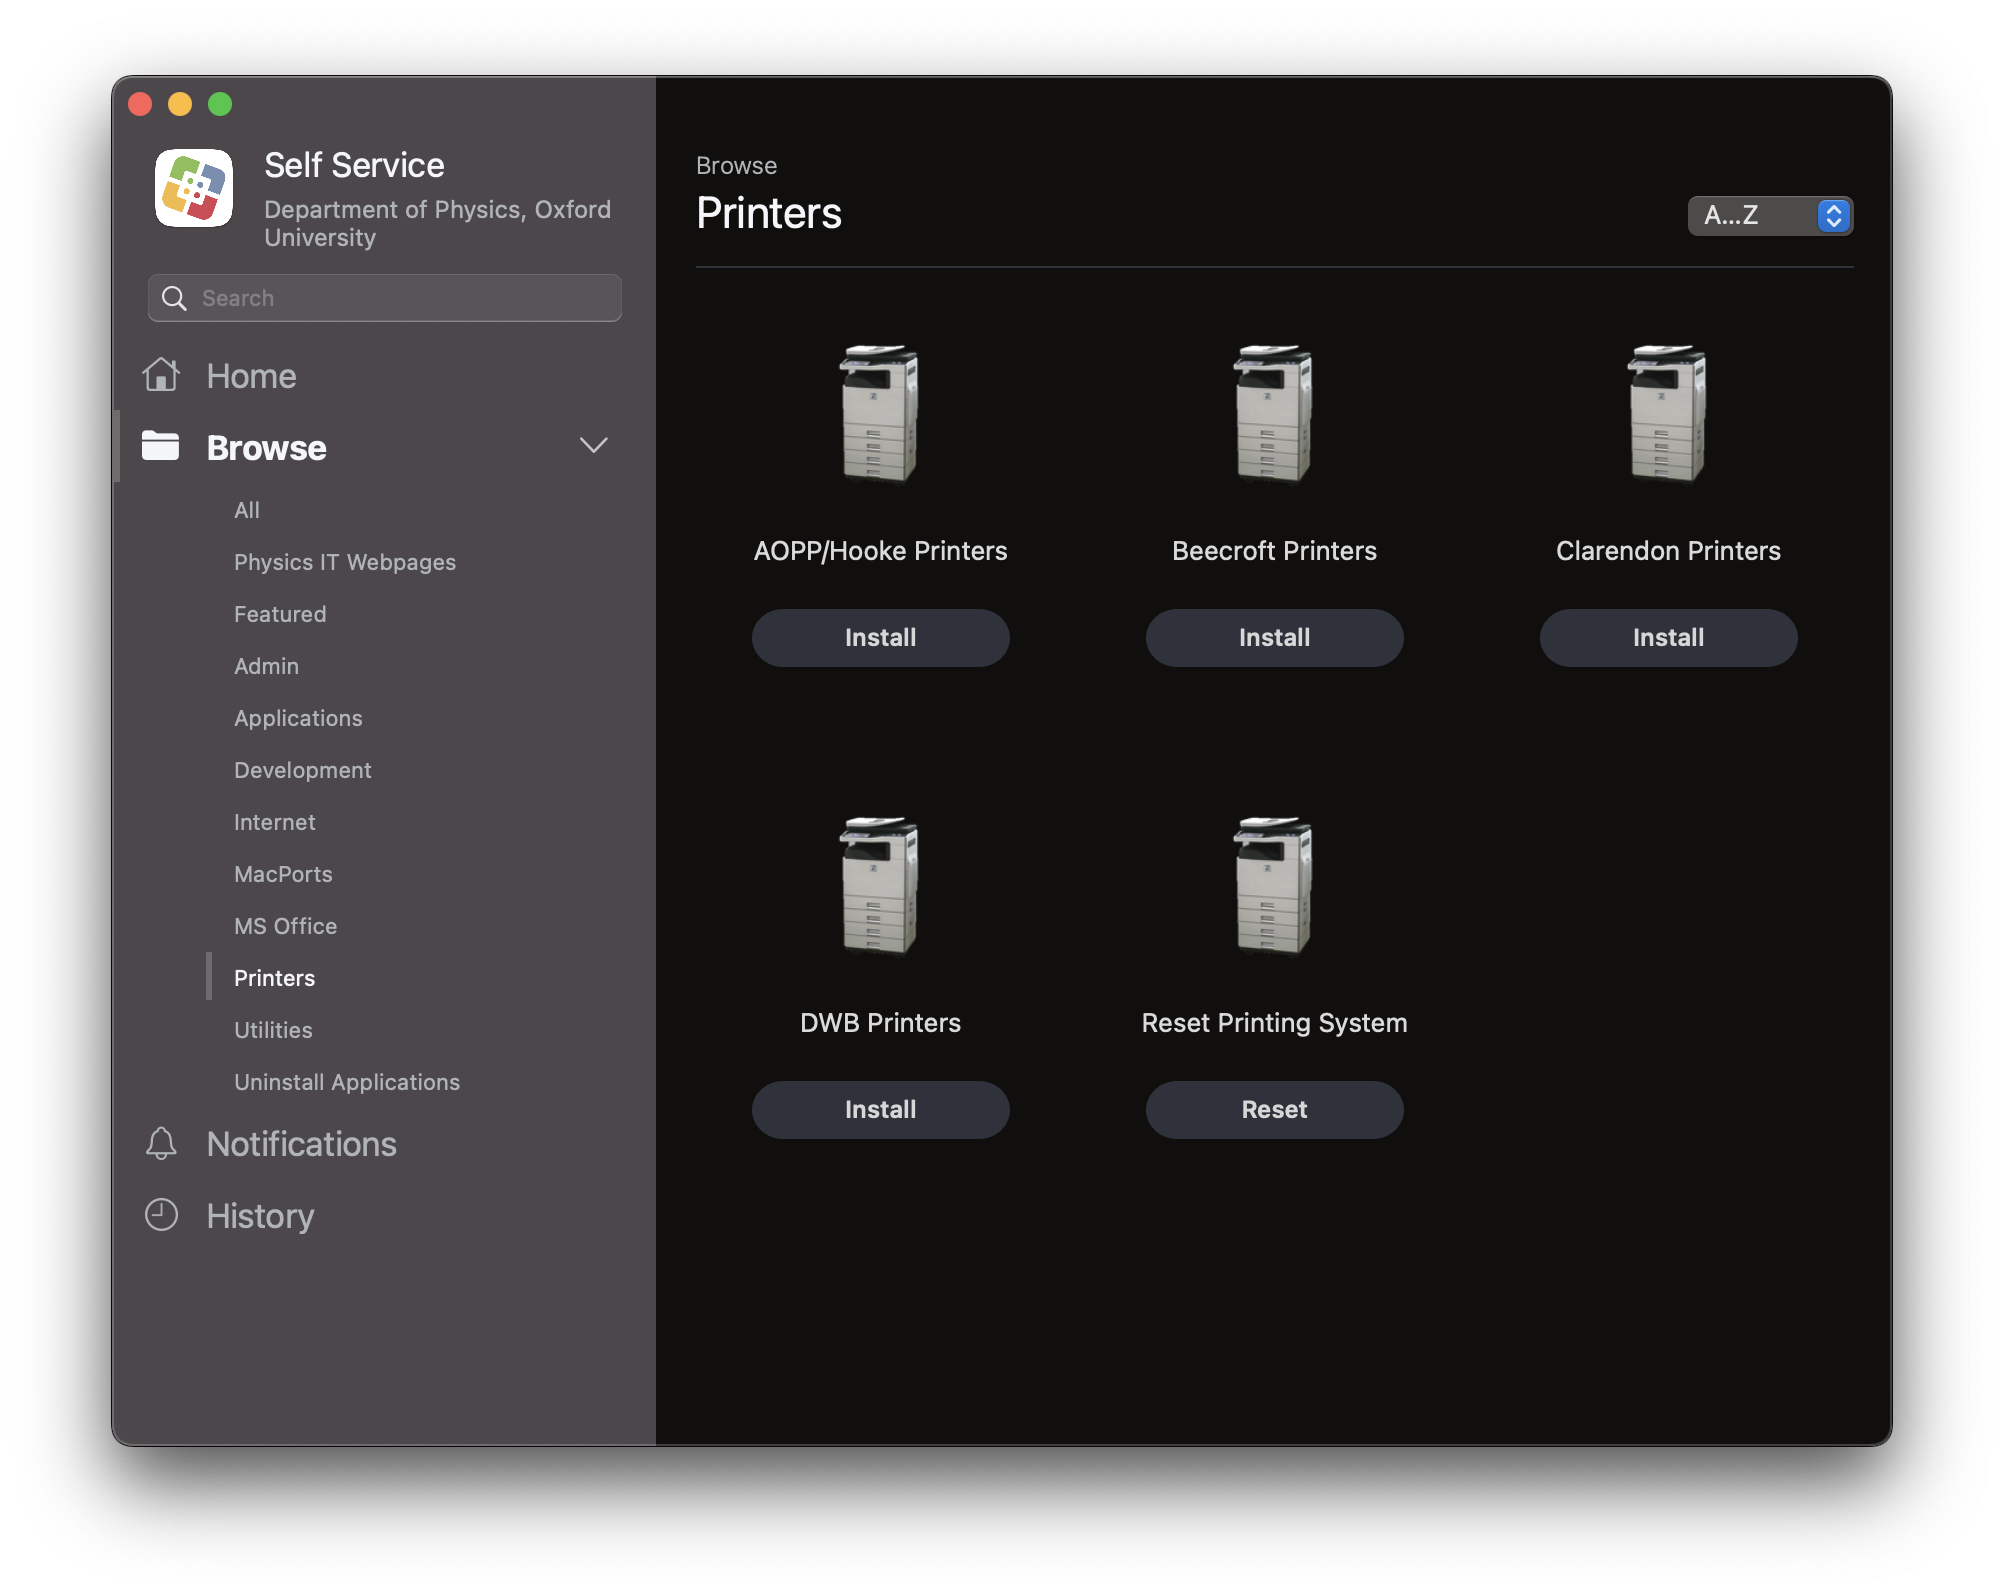
From here you install the set of printers within each building. Click install and the printers will download and install.

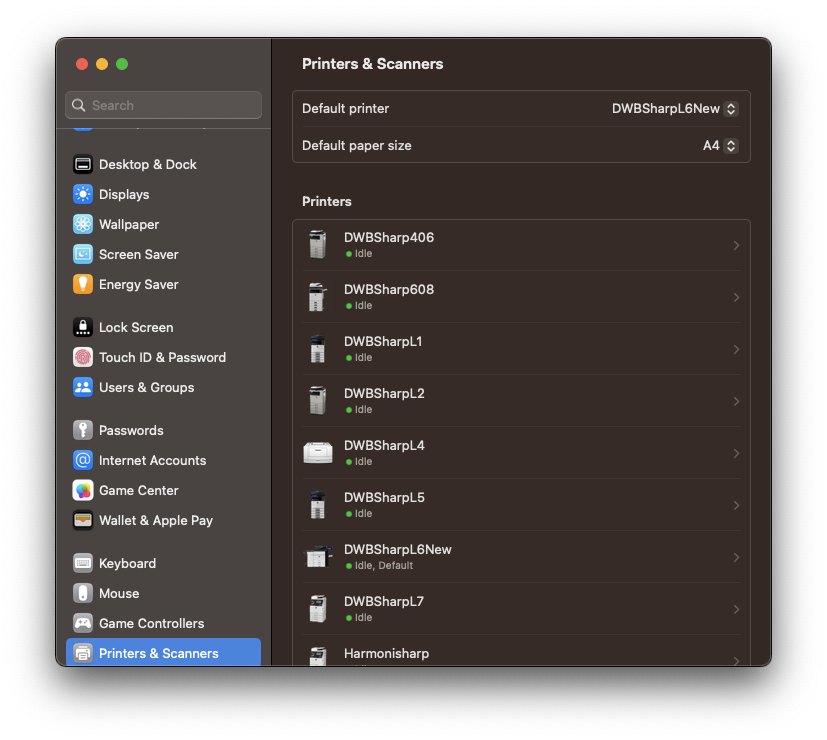
For macOS Ventura printers is now in System Setting... Scroll down to the bottem on the left hand pane and select Printers & Scanners
Manually adding public printers in macOS
- Install the correct printer drivers for the printer you wish to install (A list of public printers in Physics can be found here. Drivers can be found on Sharp Download Centre
- Go to System Preferences > Printers & Scanners
- Click on the ‘+’ button to add a printer
- Click on the globe icon on the ‘Add printer’ window.
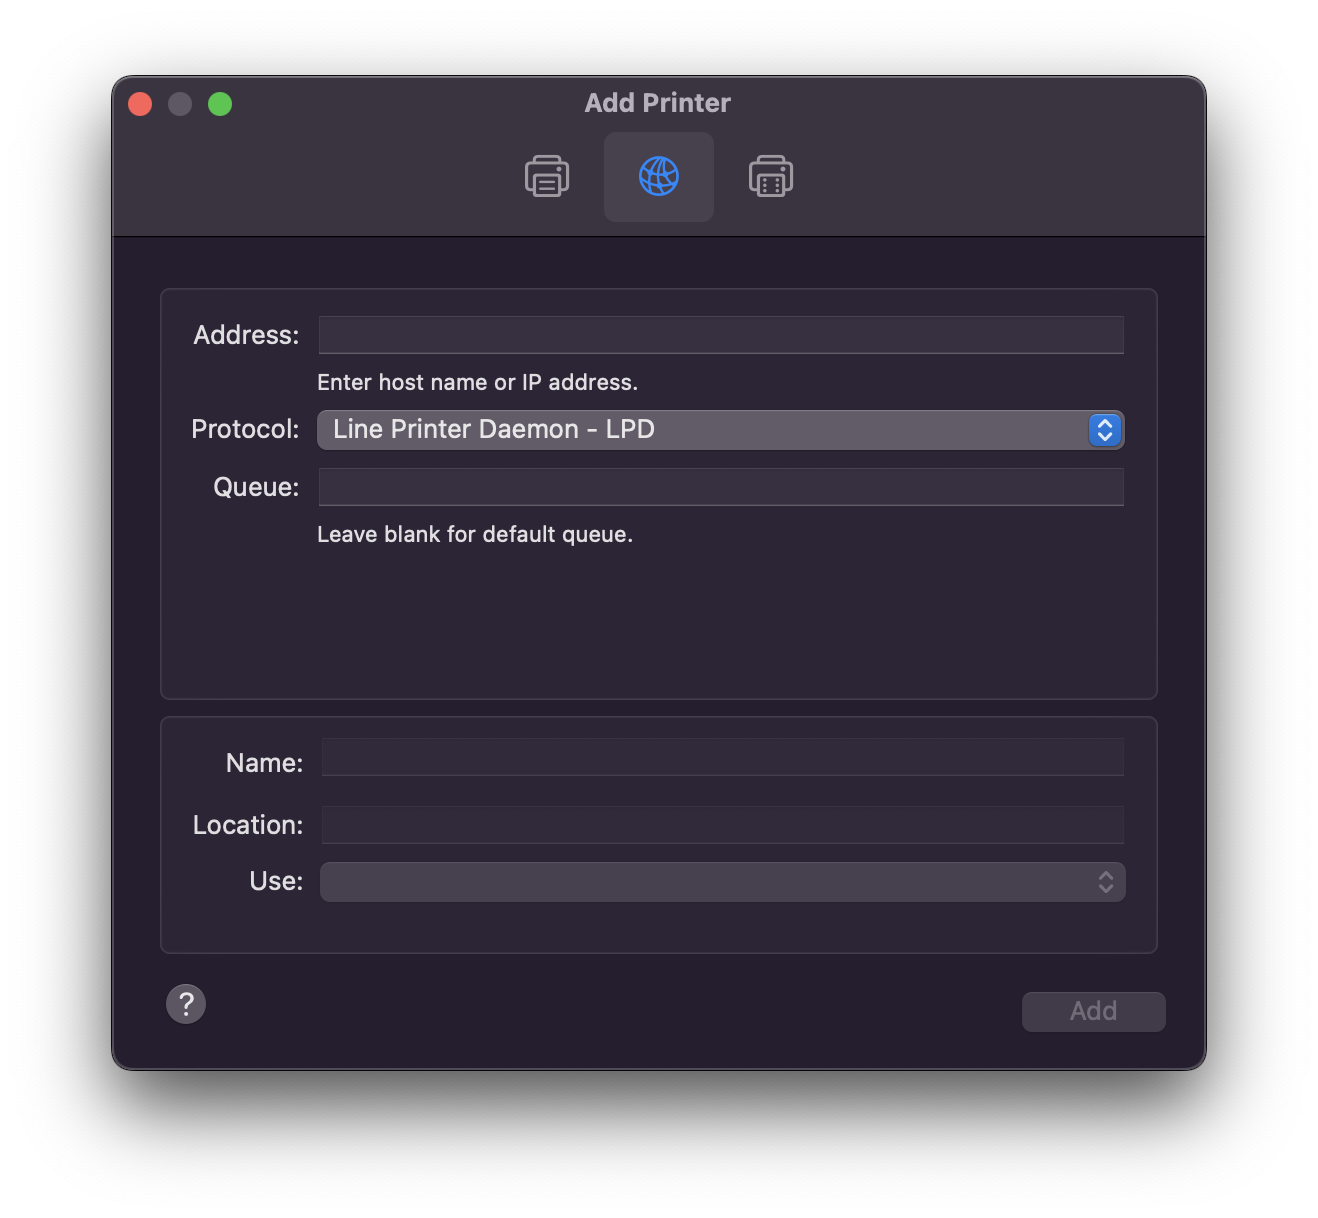
- The address is: pcounter2.physics.ox.ac.uk
- Protocol : Line Printer Daemon - LPD
- Queue: Name of the printer labelled on the printer e.g. DWBSharp406
- Name: also the name of the printer labelled on the printer e.g. DWBSharp406
- Location: where the printer is located
- Use: Select Software and select the driver that was installed in step 1 and click ‘OK’.
- Click Add
- You will be prompted with setting up the printer click on ‘OK’
Drivers
Install printer drivers via Printer Drivers installer utility in Physics Self-Service. Or download the drivers and unpack in a suitable location. RunAs administrator driverinst.bat to install.
For macOS the printer drivers are in the link above and the model numbers are below:
AOPPSharp003, SHARP MX-2610N PCL6,
AoppSharp305, SHARP MX-2640N PCL6,
AoppSharpHooke, SHARP MX-3061 PCL6,
AOPPSHARPL2, SHARP MX-4141N PCL6,
BCSharpL1, SHARP MX-2640N PCL6,
BCSharpL2, SHARP MX-C312 PCL6,
BCSharpL3, SHARP MX-3060N PCL6,
BCSharpL4, SHARP MX-3060N PCL6,
CLSharp033, SHARP MX-3061 PCL6,
CLSharp156, SHARP MX-6240N PCL6,
CLSharp171, SHARP MX-6580N PCL6,
CLSharp244, SHARP MX-C312 PCL6,
CLSharp371, SHARP MX-3061 PCL6,
CLSharpMail, SHARP MX-4112N PCL6,
DWBSharpL1, SHARP MX-2640N PCL6,
DWBSharpL2, SHARP MX-C312 PCL6,
DWBSharpL4, SHARP MX-3060N PCL6,
DWBSharpL5, SHARP MX-5141N PCL6,
DWBSharpL6, SHARP MX-6240N PCL6,
DWBSharpL6New, SHARP MX-6580N PCL6,
DWBSharpL7, SHARP MX-4071 PCL6,
HookeSharpG20, SHARP MX-C312 PCL6,
HookeSharpS49, SHARP MX-C312 PCL6,
SharpHold, SHARP MX-6240N PCL6,
Manually Adding SharpHold to macOS
- Install the driver of the printer that you will use the most (A list of public printers in Physics can be found here. Drivers can be found on Sharp Download Centre
- Go to System Preferences > Printers & Scanners
- Click on the ‘+’ button to add a printer
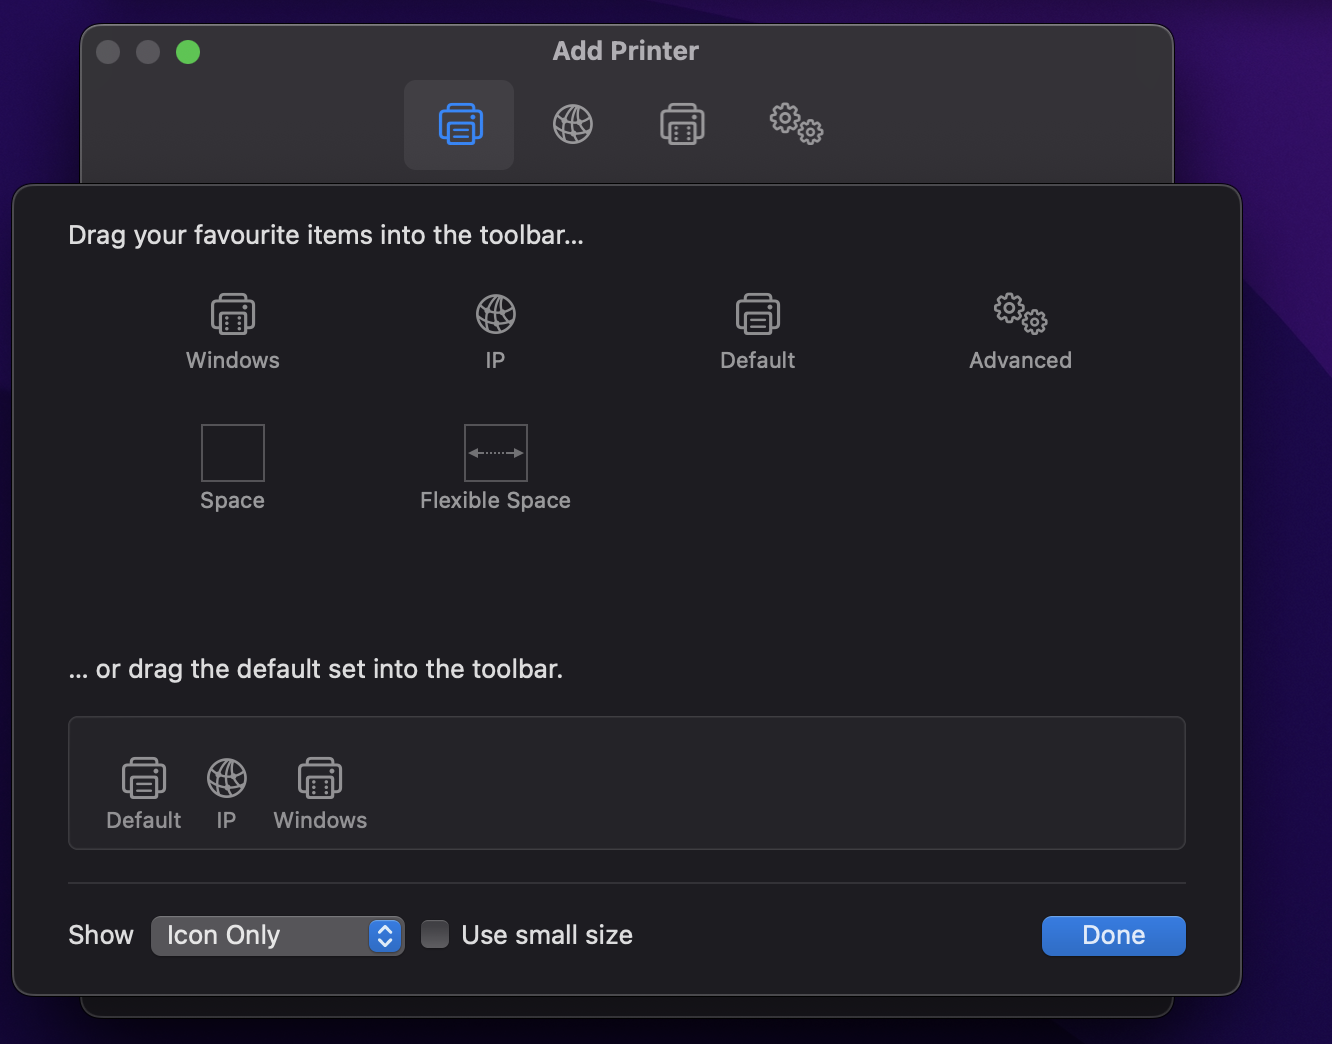
- Right click(control + click) the toolbar and select "Customise Toolbar..."
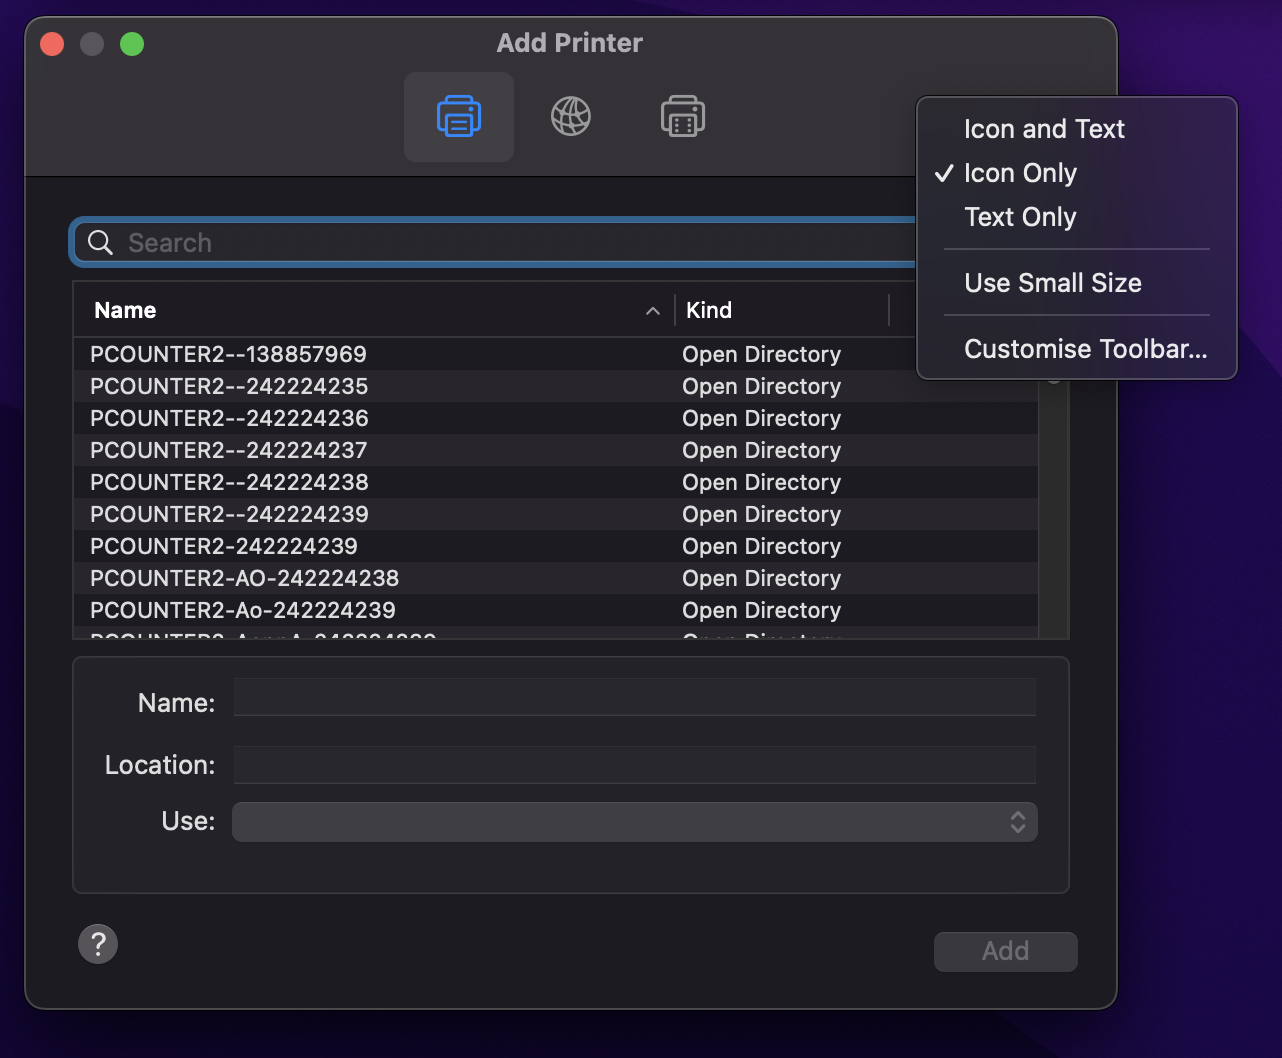
- click and drag the advance icon to your toolbar and click 'Done'
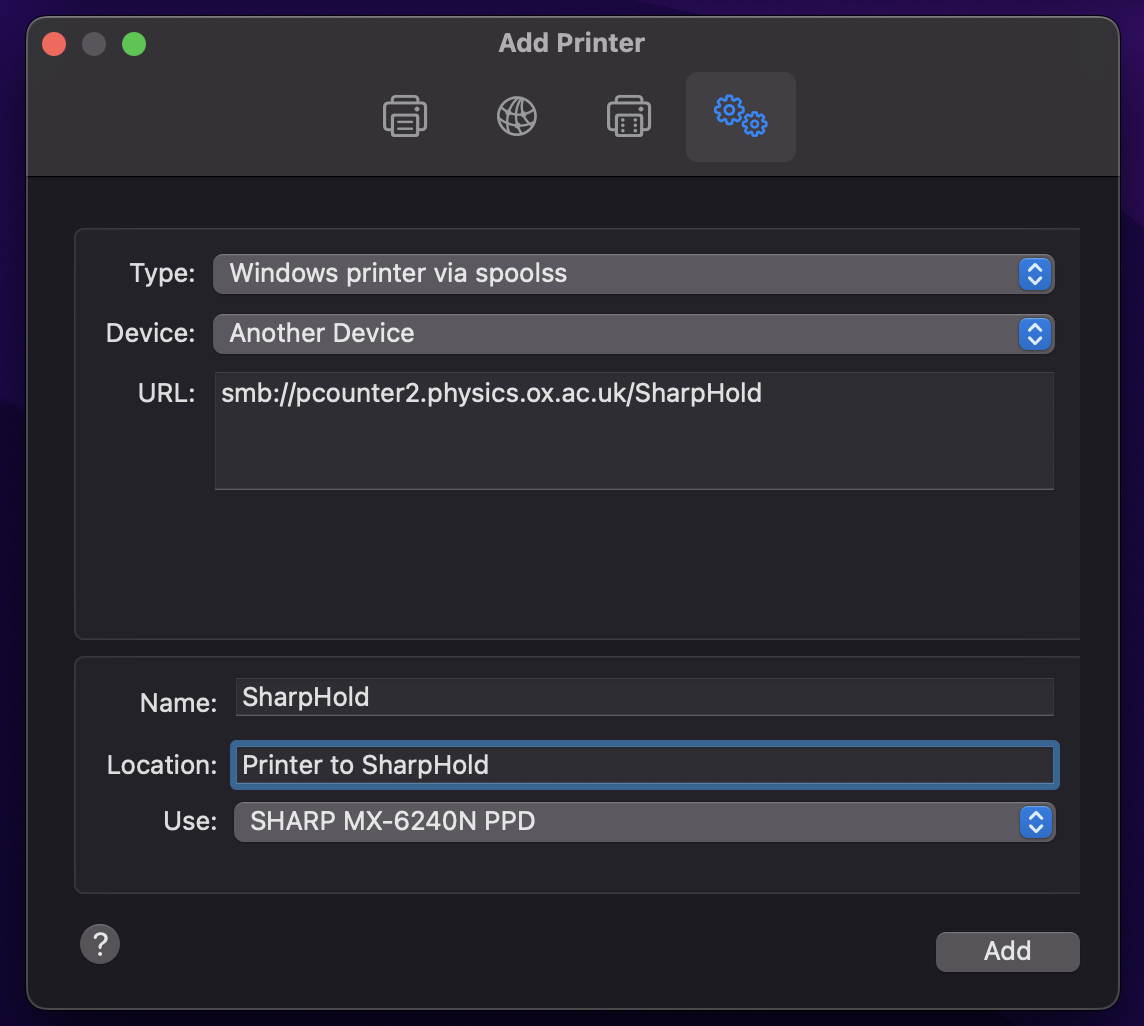
- Drop down the Type: and select "Windows printer via spoolss"
- Device: Another Device
- URL: smb://pcounter2.physics.ox.ac.uk/SharpHold
- Name: SharpHold - Location: Printer to SharpHold - Use: Sharp MX-6240PPD
| File | Size |
|---|---|
| printer driver | 18.5 MB |
Categories: Apple | Astrophysics | Mac | Printing | Theory